> For the complete documentation index, see [llms.txt](https://helpdesk.getfly.vn/llms.txt). Markdown versions of documentation pages are available by appending `.md` to page URLs; this page is available as [Markdown](https://helpdesk.getfly.vn/web-version/images-and-media/finance/setting-up-the-accounting-allocation-system.md).
# Setting up the Accounting Allocation System
## 1. How to Set Up the Chart of Accounts
Getfly allows you to fully customize the accounting chart of accounts to meet your business's specific needs. This includes adding, deleting, and modifying accounts to accurately reflect how your business operates.
To set up the chart of accounts, follow these steps:\
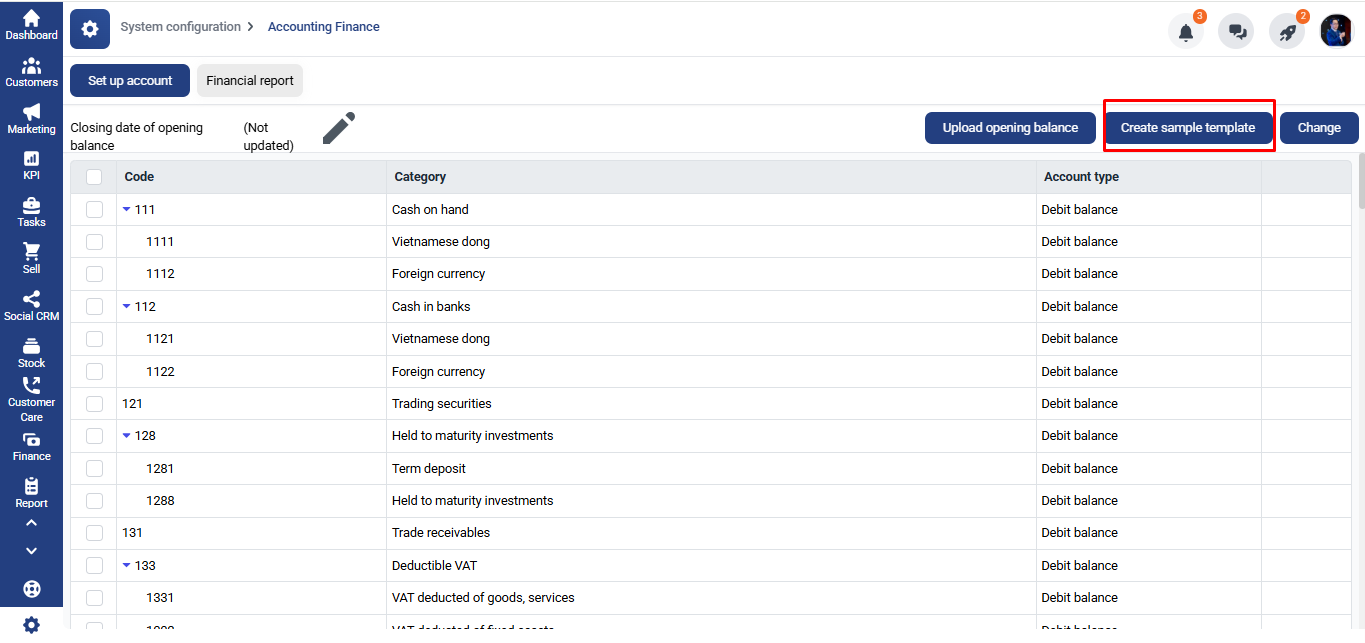
Go to **Settings** → select **System Configuration** → choose **Accounting Finance** → select **Set up Accounts**.
Here, you can select Create Template to display the sample chart of accounts:
To edit an account's details, click **Edit**, enter the required adjustments, and click **Update**.
When creating accounting accounts in Getfly, you need to select the appropriate **Account Type**, which includes:
* **Debit**: Accounts with a debit balance at the end of the period. These accounts reflect the company's assets, such as cash, inventory, fixed assets, etc. Accounts related to assets are: 1, 2, 6, 8.
* **Credit**: Accounts with a credit balance at the end of the period. These accounts reflect the company's sources of capital, such as equity, liabilities, revenues, etc. Accounts related to capital sources are: 3, 4, 5, 7.
* **Dual**: Accounts that can have either a debit or a credit balance at the end of the period, depending on the business transaction. Examples include accounts like accounts receivable, advances, etc. Dual accounts include: 131, 138, 331, 333, 338.
## 2. Setting Up Financial Reports
To set up custom financial reports and assign their names, follow these steps:
Go to **Settings** → select **System Configuration** → choose **Accounting Finance** → select **Financial Reports**.
Enter the name of the financial report and click **Add New** to complete the setup.